
Table of Contents
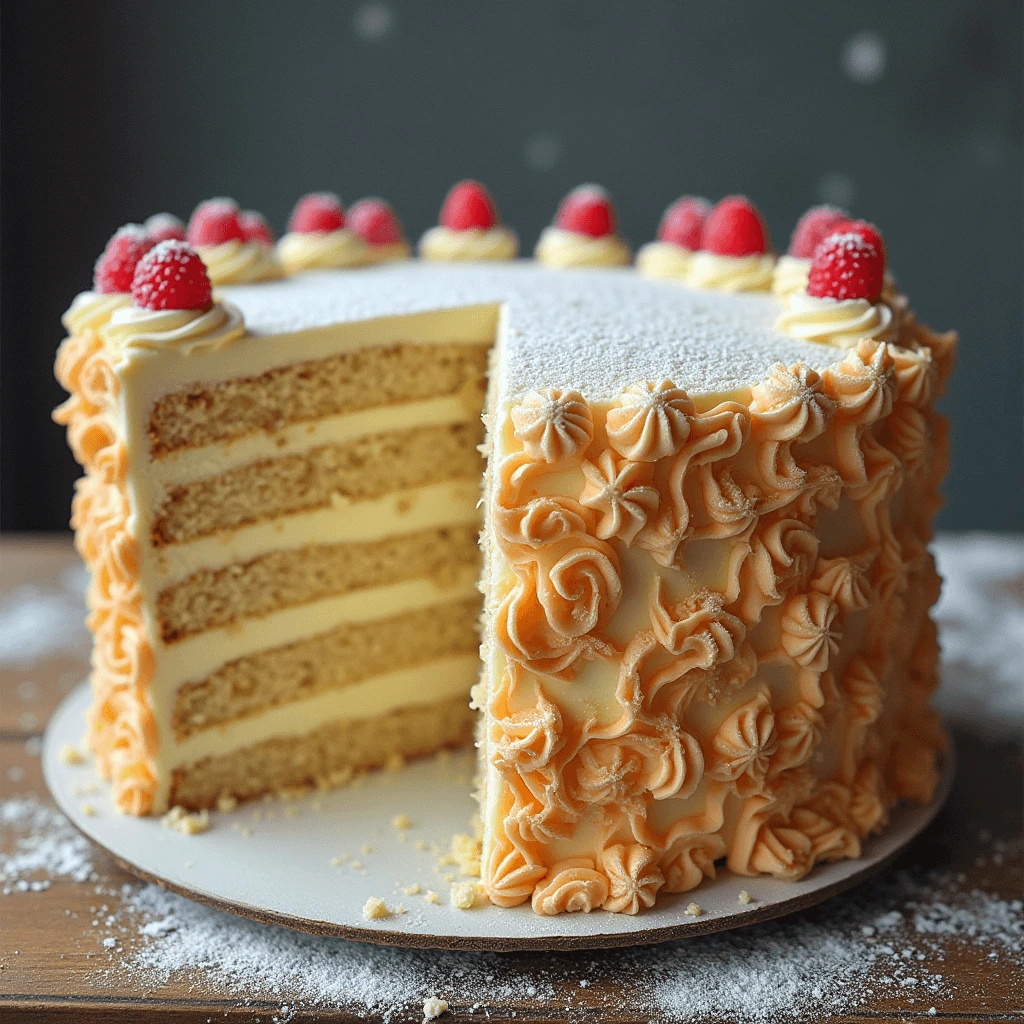
Vanilla cake holds a special place in the realm of desserts, cherished for its timeless elegance and delectable simplicity. There’s something inherently comforting about a perfectly baked four-layer vanilla cake, with its moist, tender crumb and rich, creamy frosting. Whether you’re an experienced baker or a novice in the kitchen, creating this classic cake from scratch is a rewarding endeavor that combines artistry and technique.
In this blog post, we’ll guide you through the process of making the perfect four-layer vanilla cake, from selecting the finest ingredients to mastering the art of frosting and decorating. Our step-by-step instructions and helpful tips will ensure that your cake not only tastes divine but also looks like a show-stopping centerpiece for any occasion. So, roll up your sleeves, preheat the oven, and get ready to embark on a baking adventure that will impress your friends and family with your newfound culinary prowess.
Ingredients for the Perfect Four-Layer Vanilla Cake
Essential Ingredients
To achieve a delightful and moist four-layer vanilla cake, you’ll need to gather the following high-quality ingredients:
1. Vanilla Extract
Vanilla extract is the star of this recipe, imparting a rich and aromatic flavor that elevates the cake. Opt for pure vanilla extract over imitation to achieve the best results. The depth of flavor it provides will make a noticeable difference in your cake’s taste.
2. All-Purpose Flour
All-purpose flour serves as the foundation of the cake’s structure. It provides the necessary protein content to create a tender and fluffy crumb. Make sure to sift the flour before using it to avoid lumps and ensure a smooth batter.
3. Baking Powder
Baking powder is the leavening agent that helps the cake rise and become light and airy. It’s crucial to use fresh baking powder to ensure maximum effectiveness. If it’s been sitting in your pantry for a while, consider replacing it for best results.
4. Unsalted Butter
Unsalted butter adds richness and moisture to the cake. It’s important to use unsalted butter so you can control the salt content in your recipe. Allow the butter to come to room temperature before creaming it with sugar to achieve a smooth and creamy texture.
5. Granulated Sugar
Granulated sugar not only sweetens the cake but also contributes to its tender crumb. Creaming the sugar with butter helps incorporate air into the batter, resulting in a lighter cake. Use fine granulated sugar for even distribution.
6. Eggs
Eggs play a vital role in providing structure, moisture, and richness to the cake. They also help bind the ingredients together. Use large eggs at room temperature for optimal mixing and consistent results.
7. Milk
Milk adds moisture and richness to the cake batter. Whole milk is ideal for its fat content, which contributes to the cake’s tender crumb. Ensure the milk is at room temperature to prevent curdling when mixed with other ingredients.
Optional Ingredients
In addition to the essential ingredients, there are a few optional ingredients you can add to your four-layer vanilla cake to enhance its flavor and make it uniquely yours:
1. Lemon Zest
Lemon zest can add a refreshing citrus note to your vanilla cake. It pairs beautifully with the rich vanilla flavor and adds a subtle brightness that can elevate the overall taste. Simply grate the outer peel of a lemon and mix it into your batter.
2. Almond Extract
For an added layer of nutty sweetness, you can incorporate a small amount of almond extract. This ingredient can complement the vanilla flavor and give your cake a unique twist. Be sure to use it sparingly, as a little goes a long way.
3. Sour Cream
Adding sour cream to your cake batter can make the cake extra moist and tender. It also adds a slight tanginess that balances the sweetness of the cake. Substitute a portion of the milk with sour cream for a deliciously moist cake.
4. Vanilla Bean
For an extra burst of vanilla flavor, consider using vanilla bean in addition to vanilla extract. Scrape the seeds from a vanilla bean pod and mix them into your batter. The tiny black specks of vanilla bean will add both flavor and visual appeal to your cake.
5. Buttermilk
Buttermilk can be used in place of regular milk to give your cake a richer flavor and softer crumb. It adds a slight tang and helps keep the cake moist. If you don’t have buttermilk on hand, you can make a simple substitute by adding a tablespoon of vinegar or lemon juice to a cup of milk and letting it sit for a few minutes.
6. Fresh Berries
Incorporating fresh berries like raspberries, blueberries, or strawberries into the cake batter can add bursts of fruity flavor and color. Gently fold the berries into the batter before baking for a delightful addition to your cake layers.
Importance of Using High-Quality Ingredients
When it comes to baking, the quality of the ingredients you use can make a world of difference in the final outcome of your cake. Here’s why it’s essential to prioritize high-quality ingredients for your four-layer vanilla cake:
1. Flavor
High-quality ingredients have superior flavor profiles that can significantly enhance the taste of your cake. For example, pure vanilla extract provides a rich, aromatic essence that can’t be matched by imitation vanilla. Similarly, fresh, high-quality butter imparts a rich, creamy flavor that elevates the entire cake. Using premium ingredients ensures that each bite is packed with the best possible flavors.
2. Texture
The texture of your cake is crucial to its overall appeal. High-quality ingredients contribute to a better texture, whether it’s the lightness and airiness of the cake layers or the smoothness of the frosting. For instance, using fresh, unsalted butter at room temperature helps create a creamy and stable frosting, while fresh eggs and properly measured flour ensure a tender and moist crumb.
3. Consistency
Baking is a science, and consistency is key to achieving perfect results every time. High-quality ingredients are more reliable in terms of their performance and composition. This means that you’ll have a more predictable outcome when following your recipe. For example, high-quality baking powder provides consistent leavening, ensuring your cake rises evenly and maintains a uniform structure.
4. Nutritional Value
While baking a cake is often about indulgence, using high-quality ingredients can also contribute to a slightly better nutritional profile. For instance, organic eggs and butter may contain higher levels of certain nutrients compared to their conventional counterparts. Additionally, using high-quality ingredients often means fewer additives and preservatives, which can be better for your overall health.
5. Aesthetic Appeal
High-quality ingredients not only affect the taste and texture but also the appearance of your cake. Fresh, vibrant ingredients like plump, juicy raspberries for decoration, or bright, zesty lemon zest, can make your cake visually stunning. The rich colors and appealing textures of high-quality ingredients will make your cake look as good as it tastes.
Step-by-Step Guide to Baking the Layers
Preparing the Cake Batter
The foundation of a perfect four-layer vanilla cake lies in the preparation of the cake batter. Follow these steps to ensure a smooth, lump-free, and delicious batter:
1. Mixing Dry Ingredients Separately
Start by sifting the dry ingredients together. This includes all-purpose flour, baking powder, and a pinch of salt. Sifting helps to aerate the flour and ensures that the baking powder is evenly distributed, which is crucial for an even rise. Combine these ingredients in a large mixing bowl and set aside.
2. Creaming the Butter and Sugar
In a separate bowl, cream the unsalted butter and granulated sugar together until the mixture is light and fluffy. This step is essential as it incorporates air into the batter, resulting in a lighter cake. Use a hand mixer or a stand mixer on medium speed for about 3-5 minutes, scraping down the sides of the bowl as needed.
3. Adding the Eggs
Add the eggs one at a time to the butter-sugar mixture, beating well after each addition. This helps to ensure that the eggs are fully incorporated and prevents the batter from curdling. Make sure the eggs are at room temperature, as this helps them blend more smoothly into the batter.
4. Incorporating the Vanilla Extract
Add the vanilla extract to the mixture and beat until combined. Pure vanilla extract provides a rich, aromatic flavor that is essential for a delicious vanilla cake.
5. Alternating Dry and Wet Ingredients
Gradually add the dry ingredients to the wet mixture, alternating with the milk. Start with a portion of the dry ingredients, mix until just combined, then add a portion of the milk, and mix again. Repeat this process, ending with the dry ingredients. This method helps to prevent overmixing, which can result in a dense cake. Use a spatula to gently fold the ingredients together if necessary.
6. Achieving a Smooth Batter
Ensure the batter is smooth and lump-free. Be careful not to overmix, as this can develop the gluten in the flour, leading to a tough cake. The batter should be well-combined but still light and airy.
7. Preparing the Cake Pans
Prepare your cake pans by greasing them with butter or non-stick cooking spray and lining the bottoms with parchment paper. This ensures that the cake layers will release easily from the pans after baking. Divide the batter evenly among the prepared pans, smoothing the tops with a spatula.
Baking the Cake Layers
Baking the cake layers is a critical step in creating a perfect four-layer vanilla cake. Here’s a detailed guide to ensure your cake layers turn out beautifully:
1. Preheating the Oven
Begin by preheating your oven to the temperature specified in your recipe, typically around 350°F (175°C). A properly preheated oven ensures even baking and prevents the cake from rising unevenly.
2. Preparing the Cake Pans
Prepare your cake pans by greasing them with butter or non-stick cooking spray. Line the bottoms with parchment paper to ensure the cake layers release easily after baking. Lightly dust the sides with flour to prevent sticking.
3. Dividing the Batter Evenly
Divide the prepared cake batter evenly among the cake pans. Use a kitchen scale to measure the batter for each pan to ensure equal layers. This step is important for achieving uniform layers that will stack neatly.
4. Smoothing the Batter
Once the batter is divided, use a spatula to smooth the tops of the batter in each pan. This helps create an even surface for each layer and ensures that the cake bakes evenly.
5. Baking the Layers
Place the cake pans in the preheated oven, ideally on the same rack to ensure even heat distribution. Bake the layers for the time specified in your recipe, usually around 25-30 minutes. Avoid opening the oven door frequently, as this can cause the temperature to fluctuate and affect the rise of the cake.
6. Testing for Doneness
To check if the cake layers are done, insert a toothpick or cake tester into the center of each layer. If it comes out clean or with just a few crumbs attached, the cakes are done. If there’s still wet batter on the tester, bake for a few more minutes and test again.
7. Cooling the Layers
Once the cake layers are baked, remove them from the oven and let them cool in the pans for about 10-15 minutes. This helps the cake set and makes it easier to handle. Afterward, carefully invert the layers onto a wire rack to cool completely. Remove the parchment paper from the bottoms of the layers.
8. Leveling the Layers
Once the layers are completely cool, use a serrated knife or a cake leveler to trim any domed tops. Leveling the layers ensures a stable and even cake when you stack them. Reserve the trimmed tops for snacking or making cake crumbs for decoration.
Making the Creamy Frostin
Ingredients for the Frosting
The frosting is what ties your four-layer vanilla cake together, adding both flavor and visual appeal. Here are the essential ingredients you’ll need for a creamy and delicious frosting:
1. Unsalted Butter
Unsalted butter forms the base of your frosting, providing a rich and creamy texture. It’s important to use unsalted butter so you can control the salt content. Ensure the butter is at room temperature for easy mixing and a smooth consistency.
2. Powdered Sugar
Powdered sugar, also known as confectioners’ sugar or icing sugar, is used to sweeten and thicken the frosting. Its fine texture dissolves easily, resulting in a smooth and lump-free frosting. Sift the powdered sugar before adding it to the butter to avoid any lumps.
3. Vanilla Extract
Vanilla extract adds a delightful flavor to the frosting, complementing the vanilla cake layers perfectly. Use pure vanilla extract for the best flavor. You can adjust the amount to suit your taste preferences.
4. Heavy Cream
Heavy cream is added to achieve the desired consistency of the frosting. It helps to create a light, fluffy texture that spreads easily over the cake. You can adjust the amount of cream depending on how thick or thin you want your frosting to be.
5. Salt (Optional)
A small pinch of salt can enhance the overall flavor of the frosting by balancing out the sweetness. Use it sparingly, as you don’t want the frosting to become salty. This ingredient is optional but can make a noticeable difference.
Optional Ingredients
You can also customize your frosting with a few optional ingredients to add extra flavor and creativity:
1. Cocoa Powder
For a chocolate twist, you can add cocoa powder to the frosting. Use unsweetened cocoa powder and adjust the amount of powdered sugar to balance the sweetness. This will give your frosting a rich, chocolatey flavor.
2. Citrus Zest
Adding citrus zest, such as lemon or orange, can give your frosting a refreshing burst of flavor. The citrus zest pairs well with the vanilla cake and adds a subtle tanginess.
3. Food Coloring
If you want to add a pop of color to your cake, you can use food coloring in the frosting. Gel food coloring works best as it doesn’t alter the consistency of the frosting. Be sure to add the color gradually to achieve your desired shade.
Techniques for Achieving a Smooth and Creamy Texture
1. Room Temperature Ingredients
Ensure that all your ingredients, especially the butter, are at room temperature before you start. Softened butter mixes more easily with other ingredients, creating a smoother texture. Cold ingredients can lead to lumps and an uneven consistency.
2. Cream the Butter Well
Start by creaming the unsalted butter on its own until it becomes light and fluffy. This usually takes about 3-5 minutes with a hand mixer or stand mixer. Properly creamed butter provides a smooth base for the frosting.
3. Sift the Powdered Sugar
Sift the powdered sugar before adding it to the butter. Sifting helps break up any clumps and ensures a smooth, lump-free frosting. Gradually add the sifted sugar to the creamed butter, mixing well after each addition.
4. Add Liquid Gradually
When adding heavy cream or any other liquid to the frosting, do so gradually. This allows you to control the consistency and prevents the frosting from becoming too thin. Start with a small amount and add more as needed until you achieve the desired texture.
5. Mix at the Right Speed
Mix the frosting on medium speed. Mixing at too high a speed can incorporate too much air, leading to a whipped, airy texture rather than a dense and creamy one. Conversely, mixing at too low a speed may not properly combine the ingredients.
6. Scrape Down the Bowl
Periodically scrape down the sides of the mixing bowl with a spatula to ensure all the ingredients are fully incorporated. This helps to prevent any unmixed butter or sugar from affecting the overall texture.
7. Beat Until Smooth
Continue beating the frosting until it becomes smooth and creamy. This may take a few additional minutes, but it’s worth the extra time to achieve a perfect texture. The frosting should be light, fluffy, and free of any lumps.
8. Chill if Necessary
If your frosting becomes too soft or runny, you can chill it in the refrigerator for a short time. This will firm it up and make it easier to work with. Be careful not to over-chill, as this can make the frosting too stiff and difficult to spread.
Assembling and Decorating the Cake
Preparing the Cake Layers for Assembly
Properly preparing your cake layers for assembly is crucial to achieving a stable and visually appealing four-layer vanilla cake. Here are the steps to ensure your layers are ready for stacking and decorating:
1. Cooling the Cake Layers
After baking, allow the cake layers to cool in their pans for about 10-15 minutes. This helps the cake set and makes it easier to handle. After this initial cooling period, carefully invert the layers onto a wire rack to cool completely. It’s essential to let the layers cool entirely before proceeding with assembly to prevent the frosting from melting.
2. Trimming and Leveling the Layers
Once the cake layers are completely cool, use a serrated knife or a cake leveler to trim any domed tops. This step ensures that each layer is flat and even, providing a stable base for stacking. Reserve the trimmed tops for snacking or making cake crumbs for decoration.
3. Applying a Simple Syrup (Optional)
To keep your cake moist and add a touch of extra flavor, you can brush the cake layers with a simple syrup. Simple syrup is made by combining equal parts water and granulated sugar and heating until the sugar dissolves. Let the syrup cool before brushing it onto the cake layers. This step is optional but highly recommended for added moisture.
4. Preparing the Cake Board or Plate
Before assembling the cake, prepare your cake board or serving plate. Place a small dollop of frosting in the center of the board to help anchor the first cake layer. This prevents the cake from sliding during assembly and transport.
5. Positioning the First Layer
Place the first cake layer on the prepared cake board or plate. Ensure it is centered and level. If the layer is not level, use a serrated knife to trim any uneven edges. This first layer serves as the foundation for your cake, so it should be stable and well-positioned.
6. Frosting Between Layers
Spread an even layer of frosting on top of the first cake layer using an offset spatula. The frosting between the layers should be thick enough to hold the layers together but not so thick that it overflows when the next layer is added. Repeat this process with the remaining cake layers, ensuring each layer is level and centered.
7. Crumb Coating the Cake
Once all the layers are stacked, apply a thin layer of frosting over the entire cake to seal in any crumbs. This “crumb coat” helps create a smooth surface for the final layer of frosting and prevents crumbs from mixing with the outer frosting. Chill the cake in the refrigerator for about 30 minutes to set the crumb coat.
Applying the Frosting Between Layers and on the Exterior
Frosting your four-layer vanilla cake is a crucial step that adds flavor and enhances its appearance. Here’s a detailed guide to help you achieve a smooth and even application of frosting:
1. Assembling the Cake Layers
- First Layer: Place the first cake layer on your prepared cake board or serving plate. Ensure it’s centered and level.
- Frosting Between Layers: Spread an even layer of frosting on top of the first cake layer using an offset spatula. Aim for a thickness of about 1/4 inch (6mm). Be sure to reach the edges to create a stable structure.
- Second Layer: Place the second cake layer on top of the frosted first layer. Press down gently to secure it in place. Repeat the frosting and layering process with the remaining cake layers.
2. Crumb Coating
- Thin Layer of Frosting: Apply a thin layer of frosting over the entire cake, known as the crumb coat. This layer traps any loose crumbs and creates a smooth base for the final frosting.
- Chilling: Place the cake in the refrigerator for about 30 minutes to set the crumb coat. This step is essential for a clean and smooth final layer of frosting.
3. Final Frosting Layer
- Top of the Cake: Start by applying a generous amount of frosting to the top of the cake. Use an offset spatula to spread the frosting evenly, working from the center outward.
- Sides of the Cake: Apply frosting to the sides of the cake, starting from the top and working your way down. Use the spatula to spread the frosting evenly, filling in any gaps and smoothing out the surface.
- Smoothing the Frosting: For a polished finish, use a bench scraper or cake smoother to smooth the frosting on the sides of the cake. Hold the scraper against the cake and rotate the cake board to create an even surface. Repeat this process for the top of the cake, using the offset spatula to create a smooth finish.
4. Decorative Finishing Touches
- Piping: If desired, you can use a piping bag fitted with a decorative tip to add icing swirls, borders, or other designs to the cake.
- Toppings:
Tips and Tricks for a Perfect Four-Layer Vanilla Cake
Common Mistakes to Avoid
Baking a perfect four-layer vanilla cake can be a rewarding experience, but it’s important to be aware of some common mistakes that can affect the outcome. Here are some key mistakes to avoid:
1. Not Measuring Ingredients Accurately
Baking is a science, and accurate measurements are crucial for success. Using too much or too little of an ingredient can drastically alter the texture and taste of your cake. Use a kitchen scale for precise measurements and ensure your measuring cups and spoons are leveled.
2. Overmixing the Batter
Overmixing can develop the gluten in the flour, resulting in a dense and tough cake. Mix the batter until the ingredients are just combined, and avoid excessive beating. A gentle hand is key to achieving a light and tender crumb.
3. Not Preheating the Oven
Always preheat your oven before baking. Putting the cake into an oven that hasn’t reached the required temperature can lead to uneven baking and poor rise. Preheat the oven to the specified temperature and allow it to stabilize before placing the cake inside.
4. Opening the Oven Door Frequently
Resist the urge to frequently open the oven door to check on your cake. Each time the door is opened, the oven temperature drops, which can cause the cake to rise unevenly or collapse. Use the oven light and window to monitor the baking process without opening the door.
5. Using Cold Ingredients
Cold ingredients can lead to an uneven batter and affect the texture of the cake. Ensure that ingredients like butter, eggs, and milk are at room temperature before mixing. This allows them to blend more smoothly and create a cohesive batter.
6. Not Leveling the Cake Layers
Uneven cake layers can lead to a lopsided and unstable cake. Use a serrated knife or a cake leveler to trim any domed tops and create flat, even layers. Leveling the layers ensures a stable and visually appealing cake.
7. Applying Frosting to a Warm Cake
Frosting a warm cake can cause the frosting to melt and slide off. Allow the cake layers to cool completely before applying any frosting. This ensures that the frosting adheres properly and creates a smooth finish.
8. Skipping the Crumb Coat
A crumb coat is a thin layer of frosting applied to seal in crumbs and create a smooth base for the final layer of frosting. Skipping this step can result in a messy and uneven finish. Apply a crumb coat, chill the cake to set it, and then apply the final layer of frosting.
9. Not Testing for Doneness Properly
To ensure the cake is fully baked, use a toothpick or cake tester to check for doneness. Insert it into the center of the cake, and if it comes out clean or with just a few crumbs, the cake is done. If there’s wet batter on the tester, bake for a few more minutes and test again.
Techniques for Keeping the Cake Moist
1. Using the Right Ingredients
- Fat Content: Ingredients like butter, oil, and eggs contribute to the moisture in the cake. Ensure you’re using the correct fat content as specified in your recipe.
- Buttermilk or Sour Cream: Incorporating buttermilk or sour cream in place of some of the milk can add extra moisture and tenderness to your cake.
2. Proper Mixing Techniques
- Creaming Method: Cream the butter and sugar together until light and fluffy. This step incorporates air into the batter, creating a tender crumb.
- Avoid Overmixing: Mix the batter until the ingredients are just combined. Overmixing can develop gluten, resulting in a denser, drier cake.
3. Accurate Baking Time and Temperature
- Preheating the Oven: Ensure your oven is preheated to the correct temperature before baking. An uneven oven temperature can cause the cake to dry out.
- Baking Time: Follow the recommended baking time in your recipe and check for doneness with a toothpick or cake tester. Overbaking can lead to a dry cake, so remove the cake from the oven as soon as it’s done.
4. Simple Syrup
- Brush with Syrup: After the cake layers have cooled, brush them with a simple syrup made from equal parts water and granulated sugar. This adds moisture and flavor to the cake.
- Flavor Variations: You can infuse the simple syrup with vanilla, lemon zest, or other flavors to complement the cake.
5. Proper Storage
- Airtight Containers: Store the cake in an airtight container to prevent it from drying out. If you’re not serving the cake immediately, wrap it in plastic wrap to maintain moisture.
- Refrigeration: If the cake contains perishable ingredients like fresh fruit or cream cheese frosting, store it in the refrigerator. However, let it come to room temperature before serving to ensure the best texture.
6. Freezing for Longer Storage
- Freezing Layers: If you need to store the cake layers for an extended period, wrap them tightly in plastic wrap and place them in the freezer. Thaw the layers at room temperature before assembling and frosting.
- Frosted Cake: A fully frosted cake can also be frozen. Wrap it in plastic wrap and then in aluminum foil to prevent freezer burn. Thaw in the refrigerator overnight and bring to room temperature before serving.
Conclusion
Creating the perfect four-layer vanilla cake is a rewarding and enjoyable experience that combines precision, creativity, and a bit of baking magic. Let’s recap the main steps:
- Gathering Ingredients: Start with high-quality ingredients to ensure the best flavor and texture for your cake.
- Preparing the Cake Batter: Mix the dry and wet ingredients separately, cream the butter and sugar, and gradually combine everything to create a smooth, lump-free batter.
- Baking the Cake Layers: Preheat the oven, divide the batter evenly, bake the layers, and test for doneness to achieve perfectly baked and even layers.
- Making the Frosting: Use unsalted butter, powdered sugar, vanilla extract, and heavy cream to create a creamy and smooth frosting. Customize with optional ingredients if desired.
- Assembling and Decorating the Cake: Cool the cake layers, trim and level them, apply frosting between layers, crumb coat, and finish with a smooth final layer of frosting. Add decorative touches to enhance the cake’s visual appeal.
- Keeping the Cake Moist: Use techniques like brushing with simple syrup, proper storage, and accurate baking times to ensure your cake remains moist and delicious.
Baking a four-layer vanilla cake at home is not just about following a recipe—it’s about creating something beautiful, delicious, and memorable. Imagine the delight on your friends’ and family’s faces when they see and taste your homemade masterpiece! With a bit of patience and creativity, you can make a cake that’s not only a treat for the taste buds but also a feast for the eyes.
So why not roll up your sleeves, gather your ingredients, and give it a try? The steps we’ve outlined make the process straightforward and enjoyable, and the results are truly worth the effort. Plus, the satisfaction of baking from scratch and sharing your creation with loved ones is a reward in itself.