
Table of Contents
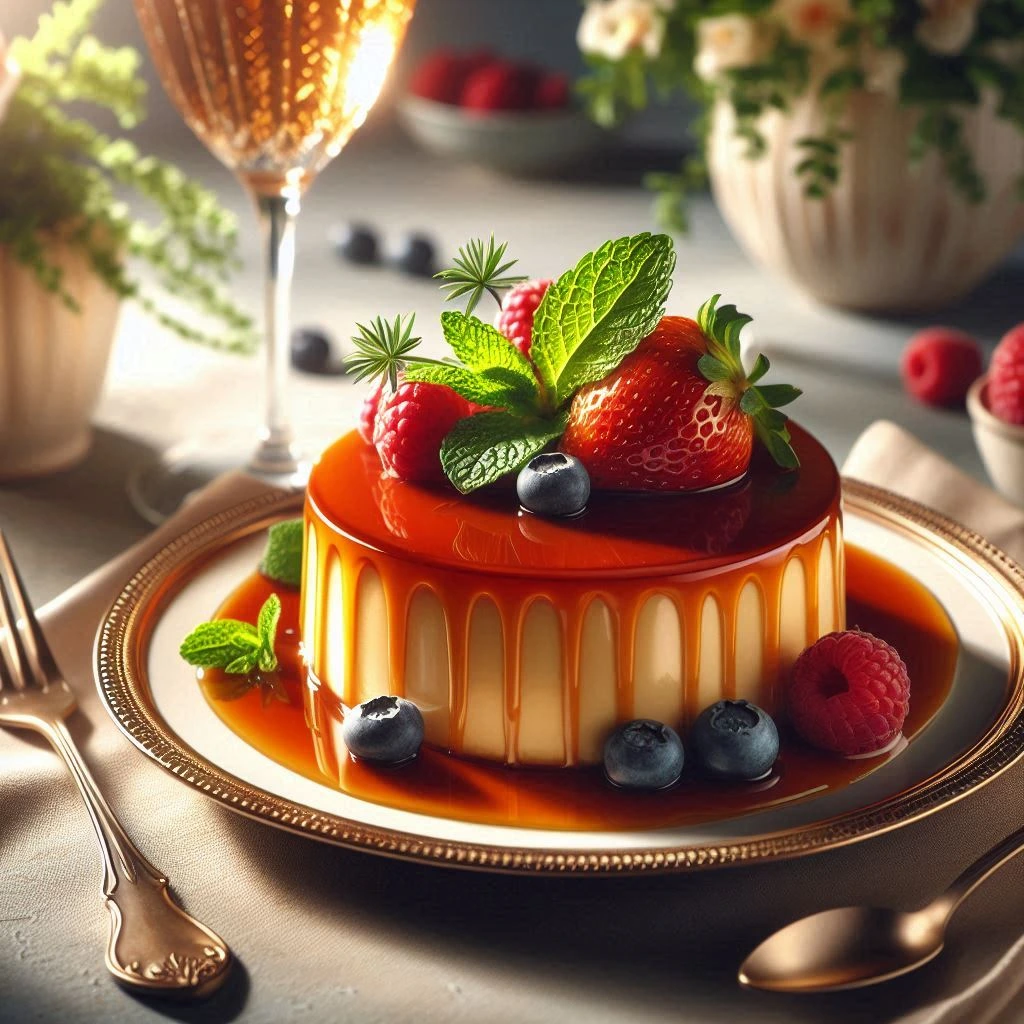
Caramel flan dessert is a beloved classic that has delighted dessert lovers for generations. With its silky-smooth custard and rich, golden caramel topping, this indulgent treat is a staple in many cultures, particularly in Latin American, Spanish, and Filipino cuisines. Despite its simple list of ingredients—eggs, milk, sugar, and vanilla—achieving the perfect balance of creamy texture and deep caramel flavor requires precision and technique.
Many home bakers face common pitfalls when making flan, such as rubbery custard, air bubbles, or caramel that hardens too much. If you’ve ever struggled with these issues, don’t worry! The good news is that with the right approach, you can avoid these mistakes and create a foolproof caramel flan every time.
In this guide, we’ll walk you through seven expert hacks that will elevate your flan-making skills. From mastering the caramelization process to perfecting the baking method, these tips will ensure your flan turns out smooth, creamy, and utterly delicious.
Mastering the Caramelization Process
Use the Right Sugar and Avoid Stirring While Caramelizing
Caramel is the heart of a great flan, and getting it right is crucial for achieving that rich, golden topping that effortlessly melts over the custard when inverted. One of the most common mistakes people make when caramelizing sugar is using the wrong type of sugar or stirring too much, which can cause crystallization and ruin the texture.
1. Choose the Right Sugar
For the best results, always use granulated white sugar when making caramel for flan. This type of sugar melts evenly and produces a smooth, amber-colored caramel without impurities. Avoid brown sugar or powdered sugar, as they contain molasses or anti-caking agents that can affect the consistency of the caramel.
2. Avoid Stirring While Melting
Once the sugar starts to dissolve, it’s tempting to stir, but doing so can cause sugar crystals to form, leading to a grainy or lumpy caramel. Instead, let the sugar melt gradually over medium-low heat and swirl the pan gently if needed to distribute the heat evenly. If sugar crystals form on the sides of the pan, you can use a pastry brush dipped in water to dissolve them.
3. Control the Heat to Prevent Burning
Caramel goes from perfectly golden to burnt very quickly. To prevent this, keep a close eye on the sugar as it melts. Once it reaches a deep amber color with a slightly nutty aroma, immediately remove it from the heat and pour it into your flan mold. Work quickly, as caramel hardens fast when exposed to cooler surfaces.
Control the Heat to Prevent Burning
Caramelizing sugar is a delicate process that requires precise heat control. If the heat is too low, the sugar may take too long to melt, leading to uneven caramelization. If it’s too high, the sugar can burn quickly, resulting in a bitter, unpleasant taste that will ruin your caramel flan dessert. Here’s how to achieve the perfect caramel consistency without burning it.
1. Use Medium-Low Heat for Even Melting
Always melt sugar over medium-low heat to ensure gradual caramelization. This allows the sugar to dissolve evenly without scorching. High heat can cause certain areas to burn before others have fully melted, leading to a bitter taste.
2. Keep a Close Eye on the Color Change
Sugar transitions from clear to golden amber and then to deep brown within seconds. The perfect caramel for flan is a deep amber color—this gives it a rich, slightly bittersweet taste. If it turns too dark, it will become bitter, so remove it from the heat immediately once you see the right shade.
3. Swirl, Don’t Stir
If you notice uneven melting, gently swirl the pan instead of stirring. Stirring can cause crystallization, which results in a grainy caramel. Swirling helps distribute the heat and ensures uniform color development.
4. Transfer Quickly Before It Hardens
Once your caramel reaches the ideal color, pour it immediately into the flan mold. Caramel hardens fast when removed from heat, so tilting the mold quickly to coat the bottom evenly will help you achieve a smooth caramel layer.
Pour the Caramel Quickly into the Mold Before It Hardens
Once your caramel reaches the perfect deep amber color, you must act fast—caramel solidifies rapidly when removed from heat. If it hardens before you pour it, you’ll end up with an uneven layer or a caramel that’s too thick, making it difficult for the flan to release properly after baking. Here’s how to ensure a smooth, even caramel layer in your mold:
1. Prepare Your Mold in Advance
Before you start caramelizing the sugar, have your flan mold (or ramekins) ready nearby. This way, you can pour the caramel immediately without wasting time searching for your mold.
2. Work Quickly but Carefully
As soon as the caramel reaches a deep amber color, remove it from the heat and immediately pour it into the mold. Caramel can go from liquid to solid within seconds, so hesitate too long, and it will start hardening in the pan.
3. Swirl to Coat Evenly
Right after pouring, tilt and rotate the mold to spread the caramel evenly across the bottom. This ensures every bite of your flan gets a perfect layer of caramel. If the caramel hardens before you can spread it, you can warm the mold slightly over a stovetop burner for a few seconds to help it loosen.
4. Avoid Touching Hot Caramel
Melted caramel is extremely hot and can cause burns if it touches your skin. Always use oven mitts or a kitchen towel when handling the mold, and avoid touching the caramel directly.
Choosing the Best Ingredients for a Creamy Flan
Importance of Fresh Eggs for a Smooth Custard
Eggs are one of the key ingredients in caramel flan dessert, playing a crucial role in giving the custard its smooth, creamy texture. Using fresh eggs ensures better consistency, flavor, and structure. Here’s why fresh eggs matter and how they contribute to the perfect flan:
1. Fresh Eggs Provide Better Emulsification
Fresh eggs have stronger proteins and a more stable composition, which helps create a smooth, well-set custard. Older eggs tend to break down more easily, which can lead to a grainy or watery flan.
2. Prevents Eggy or Sulfuric Flavor
Older eggs release sulfur compounds more readily when heated, which can give your flan an unwanted “eggy” taste. Fresh eggs have a milder flavor, allowing the sweet vanilla and caramel to shine.
3. Enhances Custard Texture
The proteins in fresh eggs coagulate evenly when baked, helping the custard set without curdling. This results in a flan that is silky and uniform, rather than lumpy or rubbery.
4. Better Binding for a Creamy Consistency
Egg yolks contribute to the richness of the flan, while the egg whites help it firm up. Fresh eggs contain the ideal ratio of water and proteins, ensuring a balanced custard that is neither too loose nor too firm.
How to Check for Fresh Eggs
- Perform the water test: Place an egg in a bowl of water—if it sinks and lies flat, it’s fresh; if it stands upright or floats, it’s older.
- Crack an egg onto a plate: Fresh eggs have firm, rounded yolks and thick whites, while older eggs spread out more.
- Check the date: Always use eggs before their expiration or “best by” date for the best results.
Use a Mix of Sweetened Condensed Milk and Evaporated Milk
The combination of sweetened condensed milk and evaporated milk is a secret to achieving the rich, smooth texture and perfectly balanced sweetness in caramel flan. Each of these milks serves a distinct purpose, and together they create the ideal custard base. Here’s why this mix is so important:
1. Sweetened Condensed Milk for Richness and Sweetness
Sweetened condensed milk is thick, syrupy, and pre-sweetened, making it a perfect base for the flan’s custard. The high sugar content helps achieve the rich, velvety texture that melts in your mouth. It also provides a deeper sweetness that enhances the caramel flavor without the need for additional sugar.
2. Evaporated Milk for Creamy Consistency
Evaporated milk is made by removing about 60% of the water content from regular milk, giving it a thicker consistency without the added sweetness. This makes it a perfect complement to sweetened condensed milk, providing a smooth, creamy texture without making the flan overly sweet. It also ensures the custard is not too heavy, creating a balanced, silky mouthfeel.
3. The Ideal Ratio for a Smooth Custard
The magic of flan lies in the balance of sweetness and creaminess. A mixture of two parts sweetened condensed milk to one part evaporated milk will create the perfect custard. This ratio results in a flan that’s both rich and smooth, with just the right amount of sweetness to complement the caramel topping.
4. No Need for Extra Sugar
Because sweetened condensed milk already contains a significant amount of sugar, there’s no need to add more sugar to the flan mixture. This prevents the custard from becoming too sweet and ensures the flan has a refined flavor.
5. Consistency and Smoothness
The combination of these two milks also ensures the custard sets perfectly without curdling. Evaporated milk provides the liquid to bind the eggs and create a smooth custard, while sweetened condensed milk helps achieve a soft, luscious texture that’s never too runny or too thick.
Adding Vanilla Extract for Enhanced Flavor
Vanilla extract is one of the simplest yet most effective ingredients you can add to your caramel flan dessert to elevate its flavor profile. While the sweetened condensed milk and caramel already bring sweetness and richness, vanilla extract infuses the custard with a warm, aromatic complexity that makes the flan irresistible. Here’s why adding vanilla is essential and how to use it to its full potential:
1. Deepens the Flavor of the Custard
Vanilla extract adds a subtle, aromatic depth to the flan’s custard, balancing the sweetness from the condensed milk and caramel. Its natural complexity enhances the overall flavor, making the dessert feel more indulgent without overpowering the other ingredients. A little vanilla can go a long way in elevating the taste of your flan, providing a richer and more well-rounded flavor experience.
2. Adds a Touch of Warmth and Sweetness
The natural compounds in vanilla, such as vanillin, bring a sweet, almost floral flavor to the custard. This warm sweetness enhances the caramel without competing with it, resulting in a harmonious balance between the two. The vanilla flavor lingers subtly, complementing the soft, creamy custard texture.
3. Enhances the Caramel Flavor
Vanilla and caramel are a match made in heaven. When vanilla is added to the flan mixture, it complements the deep, buttery notes of the caramel topping, bringing out its best characteristics. The result is a dessert with layers of flavor that blend seamlessly together.
4. Choosing the Right Vanilla
To get the best flavor, always use pure vanilla extract instead of imitation vanilla. Pure vanilla extract is made from real vanilla beans and has a much richer, more complex flavor. While imitation vanilla is more affordable, it lacks the depth and natural sweetness that pure vanilla brings to the table.
5. How Much Vanilla to Use
For the perfect caramel flan, 1 teaspoon of vanilla extract is typically enough to infuse the custard with flavor without overpowering it. Be sure to add it to the egg and milk mixture before baking for the best distribution throughout the custard.
Baking Flan the Right Way with a Water Bath
Importance of Using a Bain-Marie (Water Bath) for Even Cooking
The Bain-Marie, also known as a water bath, is a crucial technique in baking delicate custard-based desserts like caramel flan. It ensures even cooking by providing a gentle, consistent heat that prevents the custard from cooking too quickly or curdling. Here’s why using a Bain-Marie is essential for achieving the perfect texture and consistency in your caramel flan:
1. Ensures Even Heat Distribution
Baking flan in a water bath allows the heat to be distributed evenly around the flan mold. The water helps regulate the temperature, preventing direct heat from the oven from creating hot spots that could cause the custard to cook unevenly. This even cooking results in a smooth, creamy texture without any curdling or separation of the eggs.
2. Prevents Overcooking and Curdling
Flan custard is highly sensitive to temperature changes, and baking it without a water bath can result in overcooked edges and an undercooked center. The water bath surrounds the custard with moisture, ensuring the flan cooks slowly and evenly, preventing the eggs from curdling. Overcooking can lead to a grainy, rubbery texture, but the water bath helps maintain a silky, smooth consistency.
3. Helps Achieve the Perfect Texture
Flan’s signature smooth, creamy texture relies on gentle baking. A water bath allows the custard to bake at a consistent, moderate temperature (around 325°F or 160°C), allowing the proteins in the eggs to set gradually without scrambling. This results in a velvety, custardy texture that is light and not too firm, with the perfect balance of richness.
4. Prevents Cracking and Shrinking
Without a water bath, the heat in the oven can cause the edges of the flan to bake too quickly, leading to cracking or shrinking. A Bain-Marie prevents this by providing moisture, which helps the custard cook evenly and gently, reducing the risk of cracks forming on the surface.
5. How to Use a Bain-Marie Properly
- Preheat the oven to the temperature specified in your recipe.
- Place your flan mold in a larger baking pan.
- Add hot water to the larger pan, filling it halfway up the sides of the flan mold.
- Avoid overfilling the water, as too much can overflow into the flan mold during baking.
- Check the water level occasionally during baking, topping it off with hot water if needed.
Covering the Flan Mold to Prevent Over-Browning
When baking caramel flan, it’s important to monitor the color and texture of the custard to avoid over-browning or burning, especially on the top. The top of the flan can quickly brown and even dry out before the custard is fully set. To achieve a perfectly golden flan with a smooth, creamy texture, covering the mold is a simple but effective step. Here’s why it’s essential and how to do it:
1. Prevents Excessive Browning
The flan’s surface is prone to browning too quickly because it’s exposed to the oven’s dry heat. Covering the flan mold with aluminum foil or a lid prevents the top from becoming overly dark or crispy while the custard cooks. The cover helps to trap moisture, creating a more gentle, even baking environment that ensures the entire custard cooks at the same rate.
2. Maintains the Silky Custard Texture
Flan’s signature creamy texture is delicate and can be easily compromised by exposure to high heat for too long. Without a cover, the top can bake too quickly, causing a thick, dry layer to form, which will contrast with the smooth custard underneath. By covering the mold, you help retain the moisture and tenderness of the custard, ensuring it stays soft and velvety throughout the baking process.
3. Promotes Even Cooking
Covering the mold also helps the water bath do its job more effectively by preventing the water from evaporating too quickly. When the flan is covered, the steam circulates, creating a more consistent baking environment that results in even cooking and a perfectly set custard.
4. How to Cover the Mold
- Use Aluminum Foil: Loosely cover the flan mold with aluminum foil before placing it in the water bath. Make sure there’s enough room for air to circulate, but avoid letting the foil touch the custard. This will allow the flan to bake gently.
- Use a Lid: If you’re using a flan mold with a lid, cover it tightly to lock in moisture and prevent the top from browning too much.
- Check the Water Level: Ensure the water bath remains filled halfway up the sides of the mold, as this provides the necessary heat for even baking.
5. When to Remove the Cover
Once the flan has set, and you’re about 10 minutes away from the end of the baking time, you can remove the foil or lid for the final few minutes. This allows the top of the flan to lightly brown and develop its signature golden color without risking over-browning.
Ideal Oven Temperature and Baking Time
The oven temperature and baking time are key factors in making sure your caramel flan turns out perfectly smooth, creamy, and set without overcooking. Too high a temperature can cause the custard to cook too quickly, resulting in a curdled texture, while too low a temperature can leave the flan undercooked or overly runny. Here’s how to get the temperature and timing just right for your flan:
1. Ideal Oven Temperature
The best temperature for baking caramel flan is around 325°F (160°C). This moderate heat ensures the custard cooks gently and evenly in the water bath, allowing the eggs to set without scrambling or curdling. Baking at a temperature that’s too high will cause the edges of the flan to cook too quickly, leading to a rubbery texture and potentially cracking the surface.
2. Baking Time
The typical baking time for flan is between 50 to 60 minutes, depending on the size of your flan mold and the thickness of the custard. The flan should be fully set but still have a slight jiggle in the center when it’s done.
- Test for doneness: Insert a knife or toothpick into the center of the flan. It should come out clean or with just a few moist crumbs, but not wet or runny. If it comes out wet, the flan needs more time to bake.
- Jiggle test: Gently tap the side of the flan mold. The flan should jiggle slightly, indicating it’s set but still soft in the center. If it wobbles too much, it likely needs more time.
3. Adjusting for Different Mold Sizes
If you’re using smaller ramekins or molds, the flan will cook faster, typically around 40 to 50 minutes. Larger molds may require slightly more time, so be sure to test for doneness as you approach the 50-minute mark.
4. Don’t Open the Oven Door Too Often
While baking, avoid opening the oven door too frequently, as this can cause temperature fluctuations that may affect the cooking process. Open the door only when you’re checking for doneness or need to adjust the water level in the Bain-Marie.
5. Let It Cool Gradually
After baking, turn off the oven and let the flan sit in the oven with the door ajar for about 15 to 20 minutes. This helps prevent sudden temperature changes, which can cause cracks to form. Then, remove the flan from the water bath and let it cool to room temperature before refrigerating for at least 4 hours (or preferably overnight) to fully set.
Cooling and Unmolding Without Cracks
Allow the Flan to Cool at Room Temperature Before Refrigerating
Letting your caramel flan cool at room temperature before refrigerating is a crucial step in ensuring the best texture and preventing any issues during the setting process. Here’s why this step matters and how to do it properly:
1. Prevents Condensation in the Mold
If you place the flan directly into the refrigerator while it’s still hot, the temperature difference between the hot flan and the cold fridge can cause condensation to form inside the mold. This excess moisture can disrupt the smooth texture of the custard and may cause it to become watery or soggy. Allowing the flan to cool at room temperature helps prevent this problem.
2. Gradual Cooling for Better Texture
Cooling the flan gradually at room temperature helps it to set properly. Sudden changes in temperature, such as moving a hot dessert straight to the fridge, can cause the custard to contract or separate. Giving it time to cool slowly at room temperature allows the custard to firm up evenly and maintain its silky, smooth texture.
3. Minimizes the Risk of Cracking
When a hot flan is placed in the fridge too quickly, the sudden drop in temperature can cause the top to crack or the texture to become uneven. Cooling at room temperature for about 15 to 20 minutes gives the flan time to adjust to the surrounding environment, ensuring it sets properly without any cracks forming.
4. Optimal Refrigeration
Once the flan has cooled to room temperature, transfer it to the refrigerator to chill for at least 4 hours, but ideally overnight. This allows the flavors to meld and ensures the custard is fully set, making it easier to unmold and ensuring a smooth, creamy consistency when served.
5. Room Temperature Cooling Tips:
- Don’t rush the process: Allow the flan to sit out on the counter for at least 15 to 20 minutes, especially if it’s in a deep mold.
- Place it in a cool spot: Ensure that the room temperature is moderate (not too hot) to avoid accelerating the cooling process too quickly.
Chill for at Least 4 Hours for the Best Texture
Once your caramel flan has cooled to room temperature, it’s crucial to refrigerate it for at least 4 hours—but preferably overnight—for the best texture and flavor. Here’s why chilling is essential and how it affects the final result:
1. Allows the Custard to Fully Set
The custard needs time to solidify and reach the perfect creamy texture. Although it may seem set after it cools at room temperature, refrigerating the flan for several hours (or overnight) allows the proteins in the eggs to firm up completely. This step ensures that the flan holds its shape when unmolded and served.
2. Enhances the Flavor
Chilling the flan also gives the flavors time to meld together. The vanilla, caramel, and custard base all blend more harmoniously as they cool. The sweet, rich flavor of the caramel topping will infuse into the custard, creating a deeper, more satisfying taste.
3. Ensures Smooth, Silky Texture
The longer the flan chills, the smoother and silkier the texture will be. Cold flan has a dense, custardy texture that’s far more satisfying than a warm flan. The chilling process allows the custard to solidify and set with that melt-in-your-mouth consistency that’s signature to a perfect flan.
4. Helps the Caramel to Set
Chilling the flan also allows the caramel to set properly. The caramel topping that was poured into the mold hardens as it cools, making it easier to release when serving. A well-chilled flan will have a glossy, smooth layer of caramel that easily comes away from the sides of the mold without sticking.
5. Ideal Timing for Serving
For the perfect presentation and texture, you should aim to chill the flan for at least 4 hours. However, if you have time, letting it chill overnight will yield even better results. Not only does it give you a firmer custard, but it also allows the flavors to mature, making for a more delicious dessert.
6. How to Serve After Chilling
When ready to serve, run a knife along the edges of the mold to loosen the flan, then gently flip it over onto a plate. The caramel will pour over the custard, creating a glossy, irresistible topping.
Run a Knife Around the Edges and Warm the Mold Slightly Before Flipping
To ensure a smooth and easy release of your caramel flan from the mold, following these two steps—running a knife around the edges and warming the mold slightly—is key. These techniques help loosen the custard from the sides and make the flipping process more seamless, leaving you with a beautifully plated flan. Here’s how and why these steps are so important:
1. Run a Knife Around the Edges to Loosen the Custard
After your flan has chilled and set in the refrigerator, it’s time to unmold it. The first step is to gently run a sharp knife around the edges of the flan, between the custard and the mold. This helps to loosen the custard from the sides, ensuring it doesn’t stick to the mold when you flip it over. Be gentle and don’t rush—taking your time will help prevent any tears or cracks in the custard.
- Tip: If you’re using a glass or metal mold, running the knife around the edges will also help break the seal between the caramel and the sides of the mold, allowing it to flow over the flan as a glossy, silky topping.
2. Warm the Mold Slightly for Easy Release
Sometimes, the caramel can harden and cling to the sides of the mold after refrigeration, making it harder to unmold the flan. To make this process smoother, gently warm the mold before flipping the flan. Here’s how to do it:
- Place the mold in warm water: Fill a shallow dish with warm (not hot) water and briefly dip the bottom of the mold into the water for 1-2 seconds. The warmth will slightly soften the caramel, loosening it from the mold.
- Avoid soaking: Don’t immerse the entire mold—just the bottom, as you don’t want to affect the custard itself. The goal is to help the caramel release smoothly without disturbing the texture of the flan.
- Alternatively, warm the mold slightly in the microwave: If your mold is microwave-safe, you can also warm it in the microwave for 5-10 seconds on low heat. This should be enough to loosen the caramel without melting it completely.
3. Flip the Mold Quickly and Confidently
Once the edges are loosened and the mold is slightly warmed, place a plate on top of the flan mold and flip it over in one smooth motion. The flan should release easily, with the caramel cascading over the smooth custard, creating a beautiful glossy finish.
4. Troubleshooting
- If the flan doesn’t release easily, try gently running the knife around the edges once more or warming the mold slightly again. If necessary, let the flan sit at room temperature for a few minutes to loosen up before trying again.
- If the caramel is stubborn, you can also try gently shaking the mold while holding it upside down to encourage it to release.
Conclusion
Creating the perfect caramel flan might seem like a daunting task, but with the right techniques, it’s surprisingly easy to achieve a silky, smooth, and delicious dessert. By following a few simple hacks, you can ensure your flan has the ideal texture, flavor, and presentation. Here’s a quick recap of the key tips for making a foolproof caramel flan:
1. Use the Right Sugar and Avoid Stirring While Caramelizing
To achieve that perfect, golden caramel topping, always use granulated sugar and avoid stirring while it melts. Stirring can cause crystallization, leading to a grainy texture. Let the sugar melt slowly and patiently for a smooth caramel layer.
2. Control the Heat to Prevent Burning
Be mindful of the heat while caramelizing the sugar. Keep it on medium heat and watch it closely to prevent burning. A slow, steady process ensures a smooth and flavorful caramel.
3. Pour the Caramel Quickly into the Mold Before It Hardens
Once the caramel is melted, pour it into the mold immediately, as it will harden quickly once removed from the heat. Act fast to create an even layer of caramel on the bottom of the mold.
4. Use Fresh Eggs for a Smooth Custard
For the best texture, always use fresh eggs. They contribute to a smooth, creamy custard and help prevent curdling during the baking process.
5. Mix Sweetened Condensed Milk and Evaporated Milk for Perfect Richness
Combining sweetened condensed milk and evaporated milk ensures the right balance of sweetness and creaminess. This mixture creates a smooth, velvety custard that’s the perfect base for your caramel flan.
6. Add Vanilla Extract for Enhanced Flavor
A small amount of pure vanilla extract adds depth and richness to the flan, elevating its flavor profile and balancing the sweetness of the caramel.
7. Bake Using a Bain-Marie for Even Cooking
Using a water bath or Bain-Marie ensures that the flan bakes evenly at a gentle temperature, preventing curdling and helping the custard set smoothly. This method guarantees a creamy, perfectly cooked flan every time.
8. Cover the Mold to Prevent Over-Browning
Covering the mold with foil while baking prevents the flan from browning too much on top. This step ensures an even, soft top that doesn’t dry out, contributing to the perfect texture.
9. Chill for At Least 4 Hours for the Best Texture
Allow the flan to chill for at least 4 hours—or preferably overnight. This cooling period helps the custard set properly and enhances the flavor, giving you a silky-smooth flan when it’s time to serve.
10. Run a Knife Around the Edges and Warm the Mold Before Flipping
For an easy release, run a knife around the edges of the mold and warm the bottom of the mold slightly before flipping it onto your serving plate. This ensures the caramel flows smoothly over the flan, creating a beautiful presentation.
Now that you’ve mastered the art of making the perfect caramel flan, why not take it a step further and explore some fun variations? While the classic caramel flan is always a hit, experimenting with different flavors or cultural twists can elevate your dessert game even more. Here are a few ideas to try:
1. Mexican Flan
For a rich and unique twist, you can try making Mexican flan. This version often incorporates cinnamon and citrus zest (like orange or lime) to enhance the flavor profile. The subtle spice and citrus notes add a depth of flavor that complements the creamy custard and sweet caramel. You can even experiment by adding a touch of Mexican vanilla extract, which has a distinctive and more intense vanilla flavor.
2. Flavored Flans
While traditional caramel is always a winner, there are so many possibilities for infusing different flavors into your flan. Try these ideas:
- Coffee Flan: Add brewed coffee or espresso to the custard for a deliciously smooth and bold coffee-flavored flan.
- Coconut Flan: Use coconut milk or shredded coconut for a tropical flair that adds a rich, nutty flavor to the custard.
- Chocolate Flan: For chocolate lovers, mix in melted chocolate or cocoa powder for a decadent dessert with layers of rich, chocolatey goodness.
- Pumpkin Flan: Perfect for fall, add pumpkin puree and spices like cinnamon, nutmeg, and clove for a seasonal twist on the classic.
3. Layered Flans
You can also get creative by layering your flan with different textures or flavors. Consider making a chocolate and vanilla flan layered together, or even a flan with fruit (like berries) for a lighter, fresher take on the traditional dessert.
4. Vegan Flan
For those with dietary restrictions, it’s possible to make a vegan flan using coconut milk or almond milk instead of dairy and flax eggs or other egg substitutes. You can still achieve a silky-smooth texture and creamy flavor, with the right adjustments.